

Introduction
2D technical drawings are the major key component of perfection for engineers, architects, and manufacturers. You can represent the exact details by using 2D technical drawings, which will help you to understand the complex drawings. A well-designed 2D drawing will help you to eliminate all confusion, and it will minimise errors. Creating a 2D technical drawing does not just require some tools. It needs the understanding of basic principles of drafting, scaling, and accuracy for perfection. In this guide, we will learn about some steps of 2D technical writing.
Steps to Create 2D Technical Drawings
1. Understanding the Basics of 2D Technical Drawings
You must know some fundamentals before creating a 2D technical drawing. It makes your design clear and useful.
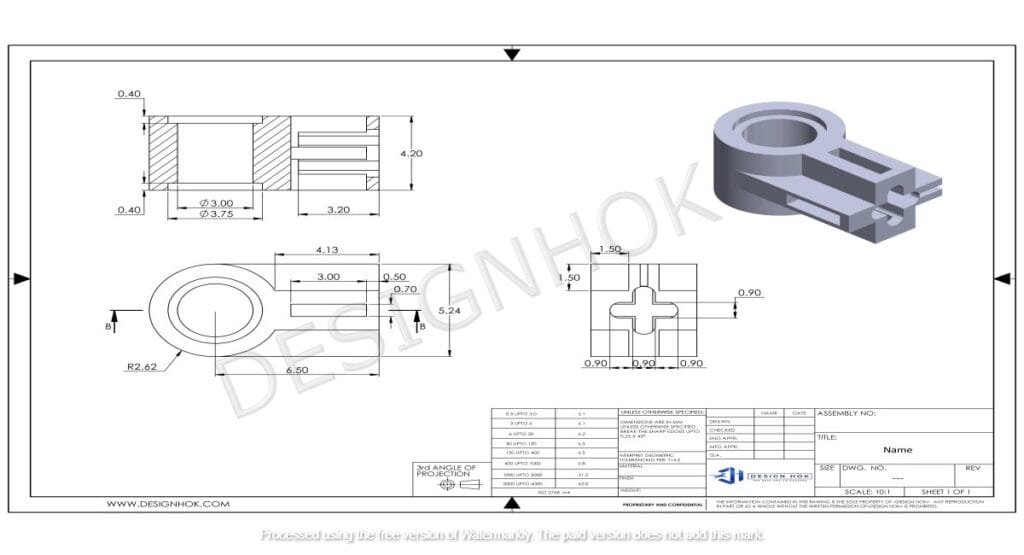
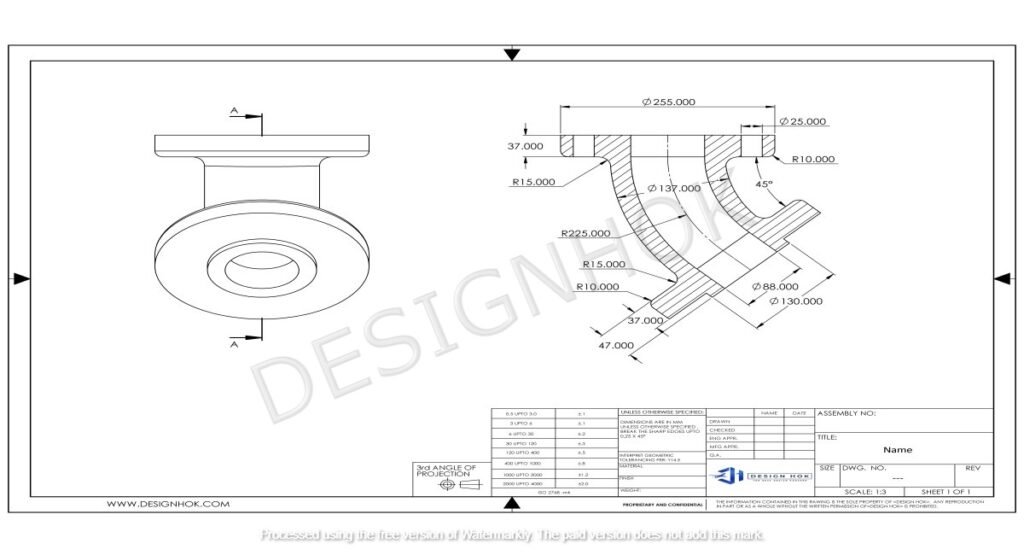
1. Types of line and thickness: Each line has its own purpose, like a solid line representing the visible edges, dashed lines representing the hidden parts, and a section line showing cutting.
2. Layout: You need more than one view in 2D technical writing, such as front, top, and side. These views ensure that the design is understandable from every aspect.
3. Scaling and Dimensioning: You must ensure accuracy in your drawings. Moreover, its dimensions should also be labelled clearly to show sizes and other things.
2. Choosing the Right Tools 2D Technical Drawings
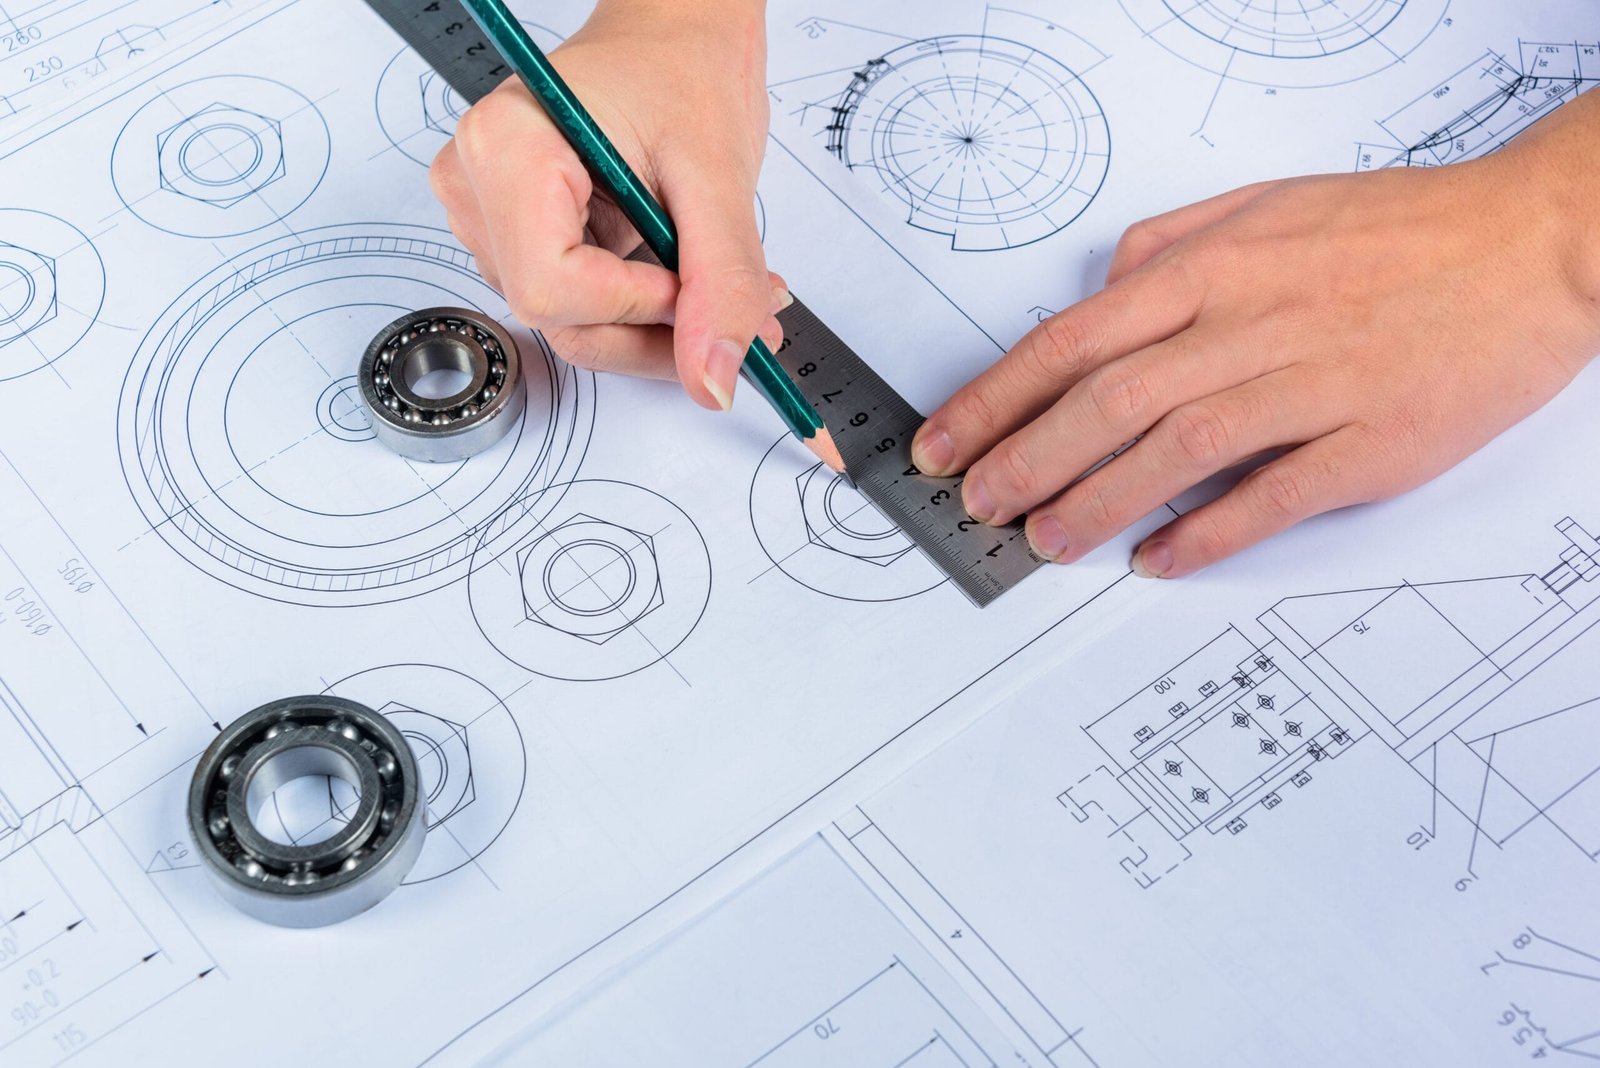
The tool you use shows the precision and efficiency of your work. For manual drafting, we use traditional tools like a compass, T-squares, and set squares to maintain accuracy. However, now professionals in this industry use CAD software tools for maintaining more precision and speed. You can also spend money on some reliable tools. At Design HOK, we used advanced tools like CAD platforms like AutoCAD, SolidWorks, and DraftSight to create detailed and precise designs. These tools allow you some extra features, which include layer management, auto dimensioning, and geometry control. It makes perfect 2D mechanical designs.
3. Selecting a Professional Drawing layout
A professional 2D technical drawings starts with a template. The standard, organized setup of the layout offers a title block, scale, and date.
In the title block, you have to show key information such as the project title, author, company name, and the dates of revisions.
Use of proper margins and borders makes your drawing clean and organised. In the end, we have to select the right scale for measurements in inches or millimetres for your industry to ensure credibility. At Design Hok, we deliver every layout according to the project requirements. We will make sure that every CAD drawing is professional, readable, and follows the international standards.
4. 2D Technical Drawings of the Object
Now you should move to 2D technical drawings and object outlines. You must begin with the front view. Here are some suggestions:
Base Views: You must start with important sides like front, side, and top. Apart from that, you also have to label the main shapes and sections of the object.
Holistic Views: You can add dissected views for complicated parts. So, you can easily explain internal structures.
Layers Management: You are able to use layers in CAD software. So, the elements of drawing become easier to manage. These elements include outlines, hatching, dimensions, and annotations.
You should review your drawing to make sure that the view is accurate and understandable.
5. Adding Dimensions and Technical Annotations
You get information about the size, distance, and angles with the help of dimensions. However, annotations give you extra information, such as material types or manufacturing instructions.
Your dimensions should be labelled outside the object for better clarity. In addition, you should ensure that the distances are consistent. You must label all the necessary measurements in a clear and brief font.
You can use standard symbols to show different things. Standard symbols, such as for holes and centerlines it should follow the international standards, like (ISO and ASME standards).
6. Finalize the Drawing
Once all dimensions and annotations are done. You must conduct a detailed review. Always double-check for missing features and overlapping dimensions.
Consistency builds credibility, especially when you are drawing a part of the construction workflow. At Design Hok, 2D technical drawings go through a quality review process to ensure perfection before the client’s delivery
7. Save Your Drawing
The CAD softwares allows you to save and export your drawing in different formats. You can use PDF format so the client can open it easily, and it is secure because we can’t make changes in PDF format. You also have the option to save a number of versions. This allows you to revert to earlier versions if needed. You must make sure that your files are easier to manage and handle. So, it becomes easier to fetch these files.
Conclusion
It is a skill to create precise 2D technical drawings; it’s more than just drafting lines- it’s a way to communicate with engineers for clear and effective intent. It involves knowing about different views, picking tools, and setting the organised layout. Whether you need AutoCAD drawing support, mechanical CAD documentation, or architectural drafting solutions, we make sure your designs stand out for their precision and professionalism.
FAQ
1. Which elements are necessary in a 2D technical drawing?
You must display multiple views, dimensions, and annotations. Moreover, you should show details like line type, scale, and a title.
2. Which tools are best for creating 2D drawings?
If you want to do it manually, then you can use tools like drawing squares, compasses, and set squares. You can use digital tools, which include AutoCAD or SolidWorks. These provide you with features for dimensioning, layering, and scaling.
3. Why do you need to do dimensioning in 2D drawings?
You get the exact measurements, angles, and specifications with dimensioning. This allows you to make parts precisely according to design.
4. How to make sure that my 2D technical drawing is accurate?
You can review everything, like dimensions and other things, to be professional. A colleague may help you maintain quality and control standards.
5. What are the best file types for sharing 2D technical drawings?
You must view in PDF format. However, DWG and DXF are best for editing.


I just like the valuable info you supply for your articles.
I will bookmark your blog and test again right here frequently.
I’m reasonably certain I will be informed lots of new stuff right right here!
Good luck for the next!
Cheers!
Thanks for the such valuable thought
Howdy just wanted to give you a brief heads up and let you know a few of
the images aren’t loading properly. I’m not sure why but I think
its a linking issue. I’ve tried it in two different internet browsers and both show the same results.